
What This Exposure Trick Does—and Why It’s Worth Learning
Night landscape photography is the practice of capturing outdoor scenes in low light or moonlight by extending exposure time so the camera sensor gathers enough photons to reveal full color, detail, and tonal range, often transforming dark environments into images that look as bright and clear as daylight while preserving an ethereal, dreamlike mood.
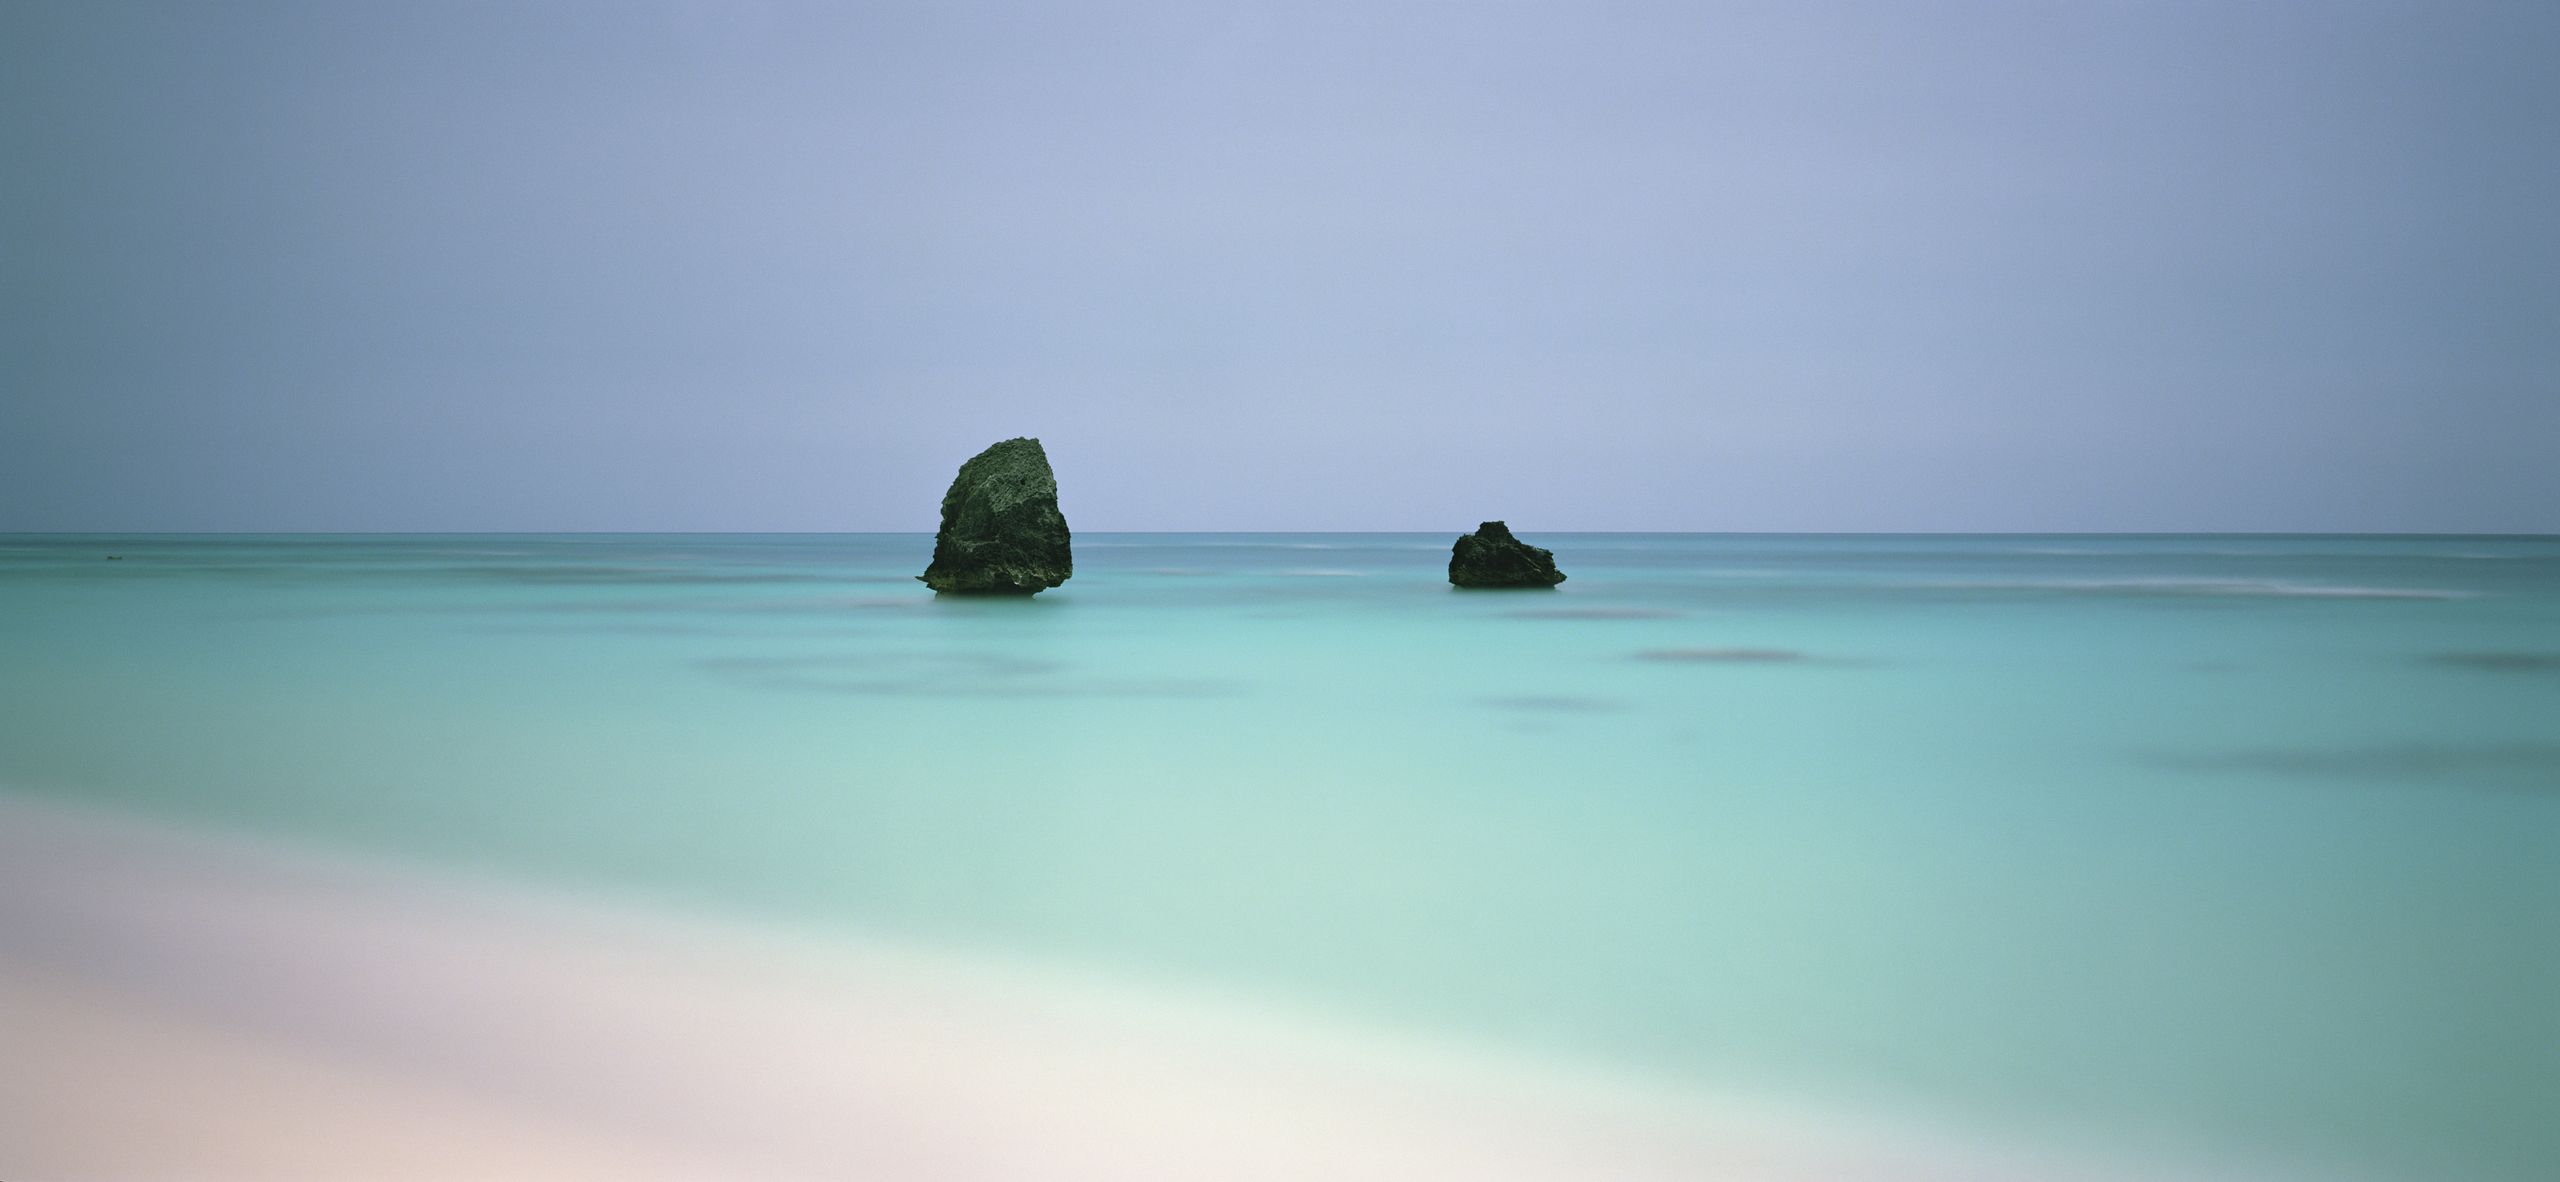
Think of this technique as a quiet alternative to crowded sunset spots: you work under the moon, stretch your exposure, and let the camera see what your eyes cannot. Darren Almond has done this for over 25 years, using long exposure so famous landscapes lit only by the moon appear as if under overcast midday sun, even though they were shot in moonlit darkness. The real caveat? Patience. You’re committing to exposures that can run for many minutes, where a single stray car headlight or drifting cloud can ruin the frame with no way to recreate that exact mix of light, tide, and season. If you’re willing to stand still in the dark and accept missed shots as part of the process, the payoff is unique, fine-art-style images that feel both calm and otherworldly.
Gear and Exposure Basics for Night Landscape Photography
You don’t need exotic equipment to begin exploring long exposure techniques, but reliable gear makes the process less painful. Capturing stunning images of the night sky and space starts with having the right gear: a camera that allows full manual control, a lens with a reasonably wide aperture, and a steady tripod. For example, one astrophotographer combined a Canon EOS RP astro‑modified for the sky with a Canon EOS R5 for the foreground, using a Tamron 35mm f/1.4 and a Canon EF 16–35mm f/4L alongside a Leofoto Ranger tripod, a Sky Watcher Sky Adventurer Pro 2i, and a VF foto white mist filter.
You can scale this down: any interchangeable‑lens camera, a wide lens, and a solid tripod are enough to start experimenting with landscape night photography. What matters more than brand is your control over exposure settings at night. Long exposure in this context means stretching shutter speed from tens of seconds to fifteen minutes or more so the sensor keeps collecting photons until the scene builds up full color and tonal range, the same as it would in daylight but gathered more slowly. Aperture and ISO then fine‑tune how much light you gather and how much noise you accept. Moon phase, cloud cover, and any artificial light in the frame all become part of your “gear” because they dictate how long your exposure needs to be.
Step‑by‑Step: Using the Moon as a Light Source
Here’s the core exposure settings night workflow, laid out like you were next to me in the field. The goal is to treat the full moon as usable illumination, not a distant subject, and stretch time until your sensor sees daylight‑like clarity. Around these steps, you’ll be juggling the biggest gotchas: wind shaking your setup, sudden headlights, and clouds sliding in mid‑exposure.
- Scout and plan around the full moon: choose a landscape that benefits from soft, even light, check forecasts obsessively for cloud cover, and note when the moon will be high enough to light your scene.
- Set up a stable tripod and compose carefully: lock your tripod firmly, frame your foreground and horizon, and decide whether you need separate sky and foreground frames (as in the cave shot that used different cameras and lenses for each).
- Dial in a long shutter speed: switch to manual mode and extend your exposure into the multi‑minute range—Darren Almond often works around a quarter of an hour or more—so the sensor keeps collecting photons until color and tonal range emerge.
- Choose aperture and ISO to balance detail and noise: use a mid‑range aperture for depth of field and set ISO low to moderate (for example ISO 800 for the sky at 60 seconds, ISO 100 for the cave foreground at 60 seconds) adjusting based on how bright the moon and environment are.
- Start the exposure and protect it: trigger with a remote or timer, then guard the scene—shield the camera from wind, watch for unplanned car headlights or drifting clouds that can ruin a 15‑minute exposure—and be ready to abort and restart if they appear.
- Review, refine, and, if needed, bracket or stack: check your histogram and sharpness, then capture additional frames for focus stacking or bracketing as needed, like combining multiple planes from upper cave edge to lower foreground to overcome near‑total darkness.
The most common mistakes at this stage are skipping the planning and underestimating how fragile a long exposure can be: a single unplanned car headlight or drifting cloud can ruin a 15‑minute exposure with no way to reshoot that exact configuration of moonlight, tide, and season. Another trap is treating the moon as a subject instead of a light source, which leads to short, noisy exposures that look like typical night shots instead of Almond‑style daylight illusions. Time is your main tool here, and, unlike new gear, it’s free if you’re prepared to wait in the dark.
Creative Examples: From Milky Way Caves to Daylight-Like Seas
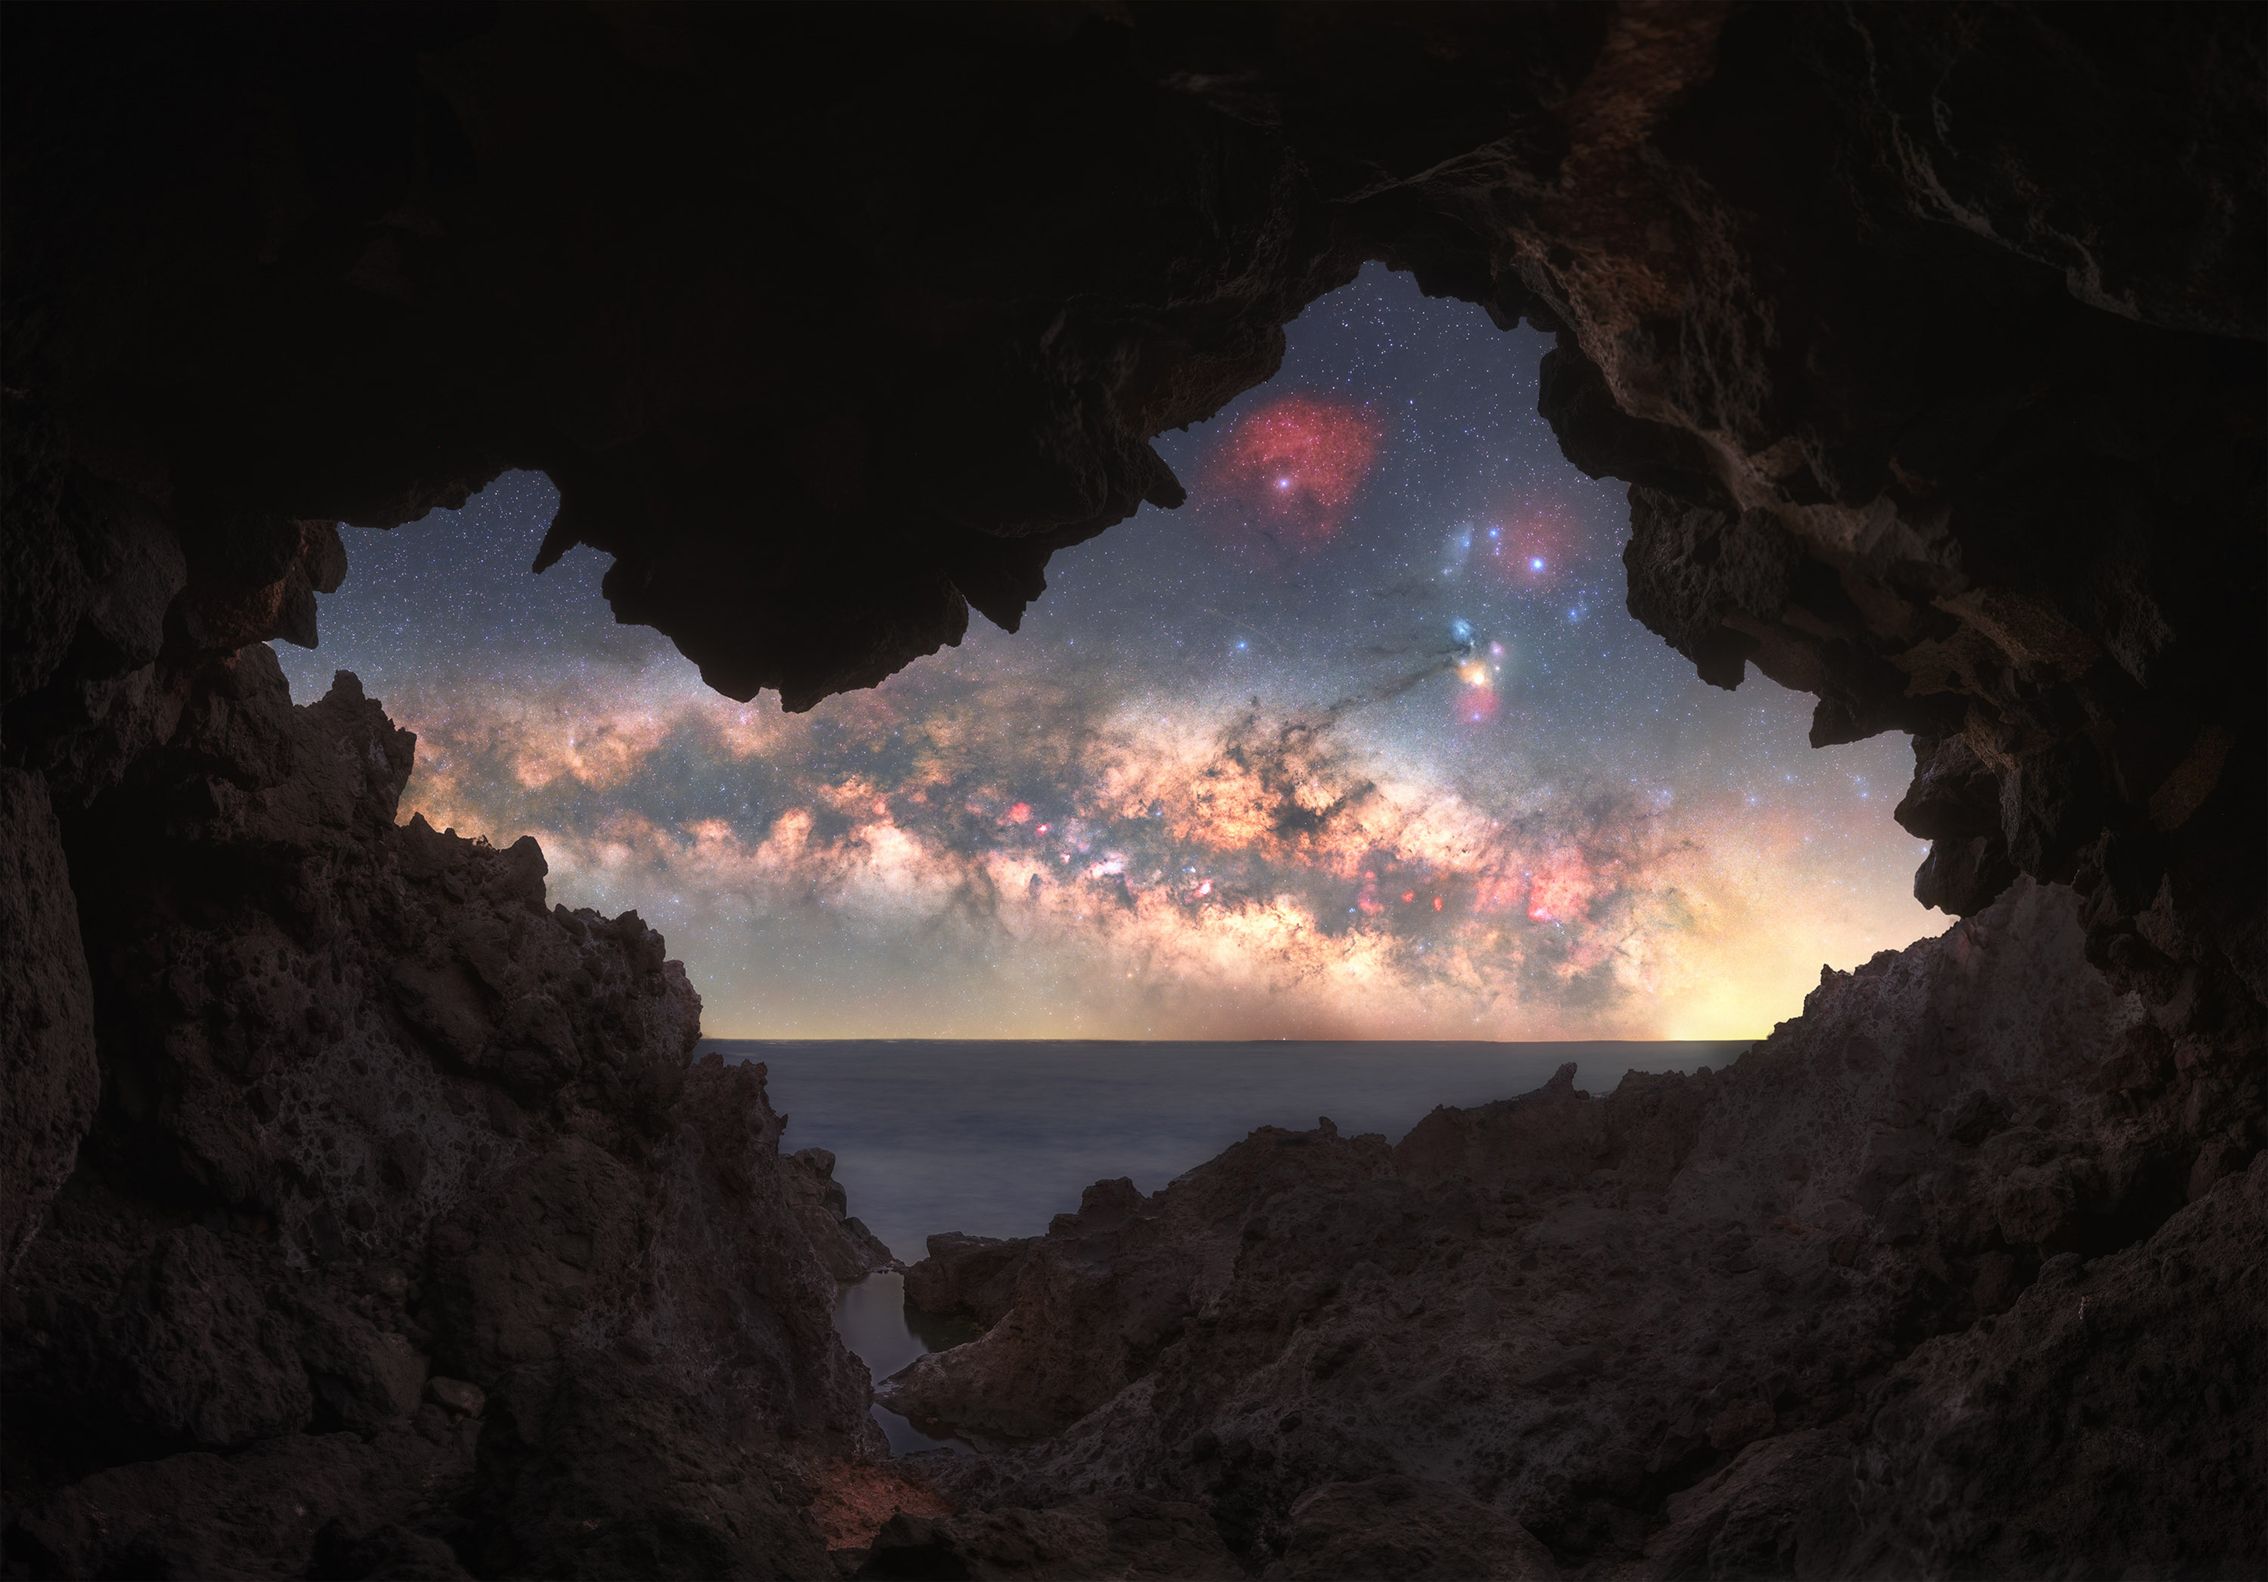
Seeing how others use these long exposure techniques helps you understand what’s possible. One astrophotographer spent nearly four hours searching for a hidden cave that felt unique and relatively undiscovered, then used a complex mix of panoramic shots, focus stacking, and bracketing to handle the foreground under near‑total darkness. Her exposure settings night approach included sky frames at 60 seconds, 35mm, f/1.8, ISO 800 and foreground panels at 60 seconds, 16mm, f/4, ISO 100, carefully illuminating the upper section of the cave and stacking focus across the upper edge, horizon, and lower foreground. The result reflected not only the scene itself but also the persistence and experience behind it, making the image especially meaningful.
Darren Almond’s Fullmoon series offers a different angle: instead of highlighting stars, he photographs celebrated landscapes under moonlight so they appear lit as if by overcast midday sun. He revisits sites already loaded with history—valleys, glaciers, temple gardens, and beaches—and captures them in long, single‑take exposures with no chance for retakes. Given a long enough exposure, be it his typical quarter of an hour or more, the sensor keeps collecting photons until the scene builds up full color and tonal range; nothing stops a long exposure from reading moonlight as reflected sunlight. This understanding of how a camera sensor behaves turns night landscape photography into a space for quiet, patient experimentation where you can give familiar places a wholly different look by working under the moon instead of chasing the golden hour.
Is the Exposure Trick Worth the Effort?
You trade comfort for control with this exposure trick. The rewards are strong: landscapes that feel like dream versions of reality, moonlit scenes that show in full color, and images that carry the memory of the effort you put in. One cave photographer described her final image as reflecting not only the scene itself but the persistence and experience behind it, which made it especially meaningful. Almond’s decades of work say something similar: given the choice between chasing a sunset with dozens of other photographers or having an entire moonlit landscape to yourself, his long‑running project offers an enticing alternative.
The key takeaway for your own landscape night photography is simple but powerful: a full moon is a usable light source, not just a subject. Once you accept that exposure is mainly about time, and that time is free if you’re prepared to stand in a field at 02:00 waiting for cloud cover to clear, you unlock a different way of working. Plan carefully, respect how vulnerable long exposures are to small changes in light, and keep experimenting with shutter speed, aperture, and ISO. Understanding exposure control does more than fix technical problems—it opens creative possibilities for night and low‑light landscapes that feel personal, quiet, and strangely bright.