
What the Intersect Mask Tool Does—and Why You Should Care
Lightroom's intersect mask tool lets you combine two or more masks so only their overlapping area is affected, giving you precise photo editing in high‑contrast scenes by eliminating tedious brush work and allowing layered, non‑destructive adjustments across skies, water, and lighting effects. This is the feature you reach for when a single sky or landscape mask gets you close, but not clean enough. Instead of zooming in and painting around tree lines or rocks, you stack conditions—like “only the sky” plus “only the top half”—and let Lightroom do the selection logic. If you already use Lightroom masking techniques such as sky masks, radial gradients, or luminance ranges, intersect masks are the shortcut that turns those tools into accurate, controllable layer masks in Lightroom. The only real caveat: you have to think in overlapping shapes instead of single, one‑and‑done masks.
Set Up a Solid Base Before You Start Masking
Before you dive into intersect masks, you want a clean, global foundation so the local work is about refinement, not rescue. In a dramatic storm example, Christian Möhrle begins by merging several raw files into a cylindrical panorama, cropping out ragged edges, and leaving one gap to fix later in Photoshop rather than cutting part of the main cloud. He switches the profile from Adobe Color to Adobe Landscape to get a stronger saturation base, brightens the exposure, pulls highlights all the way down to recover detail, and warms the white balance to correct a cold cast. With that base done, he sets gentle global contrast: texture at around seven, clarity near eight to lift midtones, and a touch of dehaze, because “clarity and dehaze both look wrong when pushed hard across the whole frame,” so the heavy lifting is saved for masks. Get your file to this balanced stage first; intersect masks work best when the image isn’t already fighting blown highlights or crushed shadows.
Step‑by‑Step: Using Intersect Masks on Sky, Water, and Light
Once the base edit is stable, the intersect mask tool becomes your way to sculpt light and contrast with far more control than a single mask can offer. Think of every intersect operation as telling Lightroom “give me only the area where these two selections agree.” Here’s how that plays out in real workflows for sky drama, realistic backlight, and crisp water detail.
- Create a broad selection for your main area, such as a sky mask or a landscape mask, and refine it if needed using invert or subtract so it targets only the region you want.
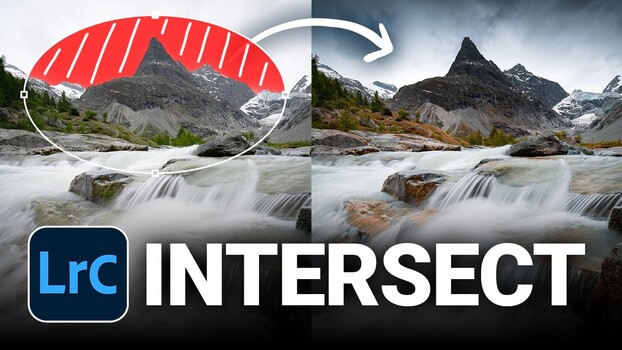
- Intersect that base mask with a gradient (linear or radial) to restrict the adjustment to a smaller zone—for example, darkening only the upper portion of the sky while leaving the mountain untouched.
- Build additional intersected masks for lighting effects, like placing a radial gradient behind a mountain peak and intersecting it with the sky mask so exposure and whites rise only in the sky, not on the mountain.
- Target detailed features in the foreground by creating a landscape mask that isolates water, then intersecting it with a radial gradient so texture, clarity, whites, and saturation increase only in the cascades, not the surrounding rocks.
- For dodging and burning, first set your tonal adjustment with a global linear gradient so you can see the effect, then intersect that gradient with a soft, low‑flow brush and paint the areas you want to lighten or darken, focusing burns on regions already in shadow to keep the result natural.
The gotcha to watch for is overreliance on a single tool: pushing clarity or dehaze too hard globally can make the whole frame look harsh, and using a plain radial gradient over water can drag in rocks you don’t want. Intersect masks solve both problems by stacking conditions, which enables precise, non‑destructive adjustments that work seamlessly with sky, water, and atmospheric lighting corrections.
Layered Contrast: From Flat Files to Dramatic, Controlled Scenes
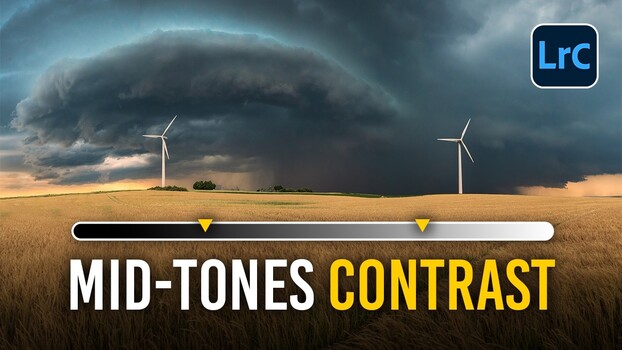
The real power of intersect masks shows up when you start layering contrast and clarity in stages across your scene. In the storm panorama, the masking section is where the sky comes alive. Lightroom struggles to select skies cleanly in panoramas, so Möhrle uses a vegetation‑based landscape mask, inverts it to grab the sky, then subtracts object masks to protect the wind turbines. On that broad sky selection, he raises contrast and adds clarity so clouds separate, then boosts saturation for a stronger blue. From there, he drops a tighter radial gradient over the main cloud and pushes clarity up to 37, stacking a broad sky mask under a tight radial gradient so the midtone punch lands on one cloud instead of hardening the entire frame. The point is layering: broad adjustments first, then progressively smaller and stronger ones as the target narrows, a digital echo of classic dodging and burning. Once you think in layers of contrast instead of one global slider, “a flat, cold panorama of a cloud over farmland becomes a dark, dramatic storm scene using nothing but contrast adjustments.”
Is the Intersect Workflow Worth It?
If your files often include bright skies, deep shadows, or busy foregrounds, mastering the Lightroom intersect mask tool is absolutely worth the small mental shift. The intersect tool lets you combine two masks so only their overlapping area is targeted, giving you precise control that add and subtract alone can’t match. It’s a clean solution to problems that would otherwise require tedious brush work, and it plugs straight into the masking techniques you already know—sky masks, landscape masks, gradients, and brushes. The workflow is practical: build a solid base, create broad selections, then intersect them into tighter and tighter corrections for skies, water, and light sources in high‑contrast scenes. Watch for two things: don’t overdrive global clarity or dehaze, and remember that each intersect mask is a layer in a stack. Keep those layers purposeful and you’ll find your edits get faster, more controlled, and far less frustrating.