
What the Lightroom Intersect Mask Does (and Why You Should Care)
The Lightroom intersect mask is a tool that combines two selection masks so that only their overlapping area is affected, which lets you isolate complex elements like skies, water, or light sources with far more precision than add or subtract alone and saves you from repetitive manual brush work when performing advanced Lightroom editing. If you often find yourself zoomed in at 200%, trying to paint around mountain edges or water cascades, this is your shortcut to cleaner results and faster workflows. Before you get fancy with mask layering in Lightroom, you still need a solid base edit. One reliable workflow starts with merging several raw files into a cylindrical panorama, cropping the ragged edges, and leaving any tricky gap for later repair in external software rather than sacrificing key cloud detail. Then switch the profile from Adobe Color to Adobe Landscape to get a stronger saturation base, brighten the exposure, pull the highlights all the way down to recover detail, and warm the white balance to fix a cold cast. Once the image feels balanced globally, you are ready to do the real work with masks.
Set Up Smart Base Masks Before You Intersect
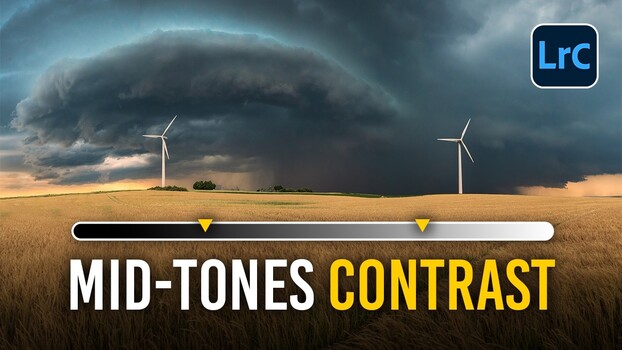
Intersect works best when you feed it clean, broad masks. Think of those first masks as your rough selection, and intersect as the scalpel that trims them to exactly where you want the effect. For panoramas, Lightroom sometimes struggles to select skies neatly, so a useful Lightroom masking technique is to start with a vegetation-based landscape mask, invert it to grab the sky, then subtract object masks to protect elements like wind turbines that should stay untouched. On that broad sky selection you can raise contrast and add clarity to separate cloud shapes, then boost saturation for a richer blue. From there, drop a radial gradient over a key cloud and push clarity up—Christian Möhrle sets it around 37—to make that single cloud your clear subject without hardening the whole frame. This is the core idea of mask layering in Lightroom: broad adjustments first, then progressively smaller and stronger ones as your target narrows. Intersect masks plug directly into that layered thinking.
Step-by-Step: Using Intersect Masks for Skies, Water, and Light
- Create your base image edit: merge your raw files into a cylindrical panorama, crop the ragged edges, and leave any minor gap to fix later in external software. Switch to the Adobe Landscape profile, brighten exposure, pull highlights down to recover detail, and warm white balance to remove a cold cast.
- Build a broad automatic sky mask, or if that fails (common with panoramas), make a vegetation-based landscape mask, invert it to select the sky, and subtract object masks to protect foreground structures.
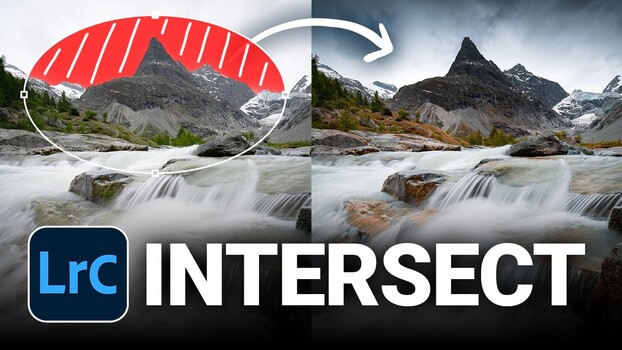
- Refine the sky with intersect: start with the sky mask, then intersect it with a linear gradient so you darken only the upper portion of the sky without touching the mountain or horizon beneath it. Adjust exposure, contrast, and clarity until the sky feels naturally heavier at the top.
- Add localized light using intersected radial gradients: place a radial gradient where you want a subtle light source behind a mountain peak, then intersect it with the sky mask so the brighter exposure and whites stay in the sky and do not bleed into the mountain.
- Target water features precisely: create a landscape mask that isolates only water, then intersect it with a radial gradient over your cascades so the adjustment applies to the overlapping area alone. Increase texture, clarity, whites, and saturation to make those cascades stand out while leaving surrounding rocks untouched.
- Set up dodging and burning with intersect: define a tonal adjustment first using a wide linear gradient covering the whole frame so you can see the effect, then intersect that gradient with a soft, low-flow brush and paint only the areas you want to lighten or darken. For burning, stay with zones that are already in shadow so the result doesn’t look fake.
The big win here is that you dial in the look of an adjustment before deciding where it lands. According to Christian Möhrle, this changes how you think about dodging and burning because you are no longer painting blindly—you are applying already-tested tonal moves to carefully defined regions. Combined with layered contrast adjustments, a flat, cold panorama of farmland and a single cloud can turn into a dark, dramatic storm scene using contrast alone, with the masking section making the sky come alive.
Common Mistakes with Intersect Masks and Contrast
The intersect tool is powerful, but it will not save you from rough global choices. Two mistakes show up often. First, pushing clarity and dehaze hard across the whole frame. Clarity and dehaze both tend to look wrong when used globally at high values, so keep them gentle for the base edit and reserve the heavy lifting for local masks. Second, leaning too much on global contrast. Contrast stretches the entire tonal range in one go, which can crush shadows and blow highlights when overused. In advanced Lightroom editing, you want contrast in layers, guided by masks. Intersect masks help you avoid another subtle problem: effects bleeding into areas that break realism. A radial gradient meant to brighten the sky will bleed into a mountain peak unless you intersect it with a sky mask, but intersecting keeps the effect exactly where it belongs. For burning, always aim at areas already in shadow; hitting bright regions with heavy darkening is what makes things look unnatural.
Is It Worth the Effort? What to Watch for Long-Term
Once you get comfortable with intersect masks, manual brushing starts to feel like using a sponge for detail work. The intersect tool lets you combine two masks so only their overlapping area is targeted, which gives you precision that add and subtract alone cannot match and solves edits that would otherwise demand tedious brush work. It is a clean answer to messy selections in complex scenes. The payoff is clear: dramatic skies stop being luck once you think in layers of contrast instead of one global setting. The masking section is where the sky comes alive, and the dodging and burning section is where this intersect technique becomes especially useful for subtle light control. Watch out for one thing: complexity for its own sake. Layer masks because each one has a clear job—broad sky tone, upper sky darkening, localized glow, water detail—not because the tools are available. Used with intent, intersect masks will reduce editing time, automate mask layering workflows, and keep your skies, water, and lighting effects clean and believable.