
Night Photography Shows Every Flaw—Use That to Your Advantage
Night photography is the practice of capturing scenes after dark, where limited light makes every weakness in your technique visible through blurry shots, muddy colors, blown highlights, and noisy shadows, forcing you to control exposure and focus much more deliberately than in daylight.
If your night photos fall apart on a big screen, that is not a gear problem, it is a settings and technique problem. Night photography has a way of exposing every weakness in your technique: images that looked sharp on the LCD turn out blurry, colors look muddy, highlights blow out, and shadows become noisy. The good news is that these failures are predictable, so they can be prevented. You do not need the newest camera or the fastest lens to create beautiful night photographs; avoiding a few common mistakes will give you sharper, cleaner results. This starts with making exposure a conscious choice instead of something the camera guesses for you.
Stop Trusting Auto: Core Night Photography Settings That Matter
Relying on Auto mode at night is one of the fastest ways to ruin a good scene. Your camera has no idea whether you want frozen motion, light trails, silhouettes, or deep depth of field, so it may raise ISO too high, pick the wrong aperture, or choose a shutter speed that smears everything. Night photography almost always benefits from Manual Mode or a Priority Mode because you gain direct control over exposure, motion blur, noise, and depth of field.
The most damaging misconception is that ISO 100 is always best. In low light, that forces very long shutter speeds that amplify camera shake and subject movement. Sometimes increasing your ISO produces a cleaner final image because it allows a faster shutter speed that keeps things sharp. Do not be afraid of ISO 800, 1600, or even 3200 when the scene demands it; a little noise is much easier to fix than motion blur. Treat ISO, shutter speed, and aperture as a three-way balance, not fixed rules.
Fix Blurry Night Photos: Stability and Focus First
If your main complaint is “my night photos are always soft,” your first job is to stop the camera and your focus from wandering. As light levels drop, shutter speeds become much longer, and even the slightest movement from your hands can soften an otherwise beautiful image. Handholding in these conditions is usually a recipe for blur, so use a sturdy tripod whenever possible, trigger the shutter with a remote release or a self-timer, and add a short delay if you do not have a remote. A stable camera is the foundation of sharp night photography.
Focus is the second silent killer. Autofocus relies on contrast, and at night there often is not enough. Your camera may hunt back and forth or lock onto the wrong object, so many blurry night photos are simply the result of missed focus. Focus before it gets dark if you can, use Live View magnification, manually focus on a bright star or distant light, then switch the lens to Manual Focus so it stays locked. If you are on a tripod, turn image stabilization off so it does not introduce its own micro-movements.
Control Low Light Exposure and Color Instead of Fighting Them
Low light exposure is unforgiving because small errors either blow out highlights or drown the scene in muddy shadows. As the light drops and shutter speeds lengthen, you need to decide what matters more: freezing motion or keeping ISO lower. Many lenses are weaker at their widest aperture; while f/1.4 or f/1.8 lets in more light, it can reduce corner sharpness and increase optical flaws. If your scene allows it, stop down by about one stop; the small loss of light is often worth the increase in image quality. Combine that with a slightly higher ISO to keep shutter speed within a range that avoids blur.
Your screen will lie to you in the dark, making images look brighter and more balanced than they are. Instead of judging by the LCD alone, use the histogram to see whether your highlights are clipped and whether your shadows contain usable detail. For color, Auto White Balance often struggles under mixed artificial lighting like streetlights, LEDs, neon signs, and moonlight. Shoot RAW, experiment with Kelvin white balance, and fine-tune the colors during editing so your night photos look more natural instead of green or orange.
Expose for What Matters and Leave Room for Night Photo Editing
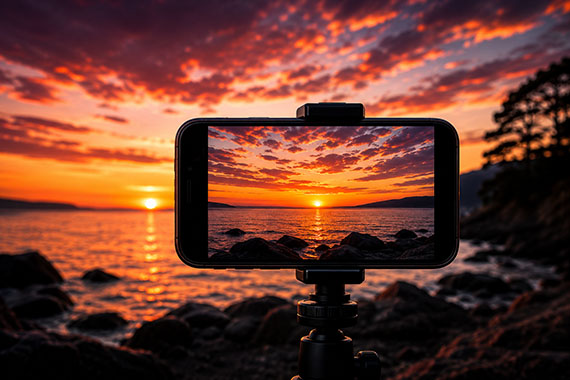
One of the smartest habits you can borrow from sunset photography is to expose for the brightest areas you care about, then let less important parts of the frame go darker. For example, tapping on the brightest part of the sky on a phone tells it to expose for the sky rather than the landscape, preserving rich colors and cloud detail. After that, lowering the exposure slightly with the brightness slider keeps highlights from blowing out and restores vibrance. Letting the foreground fall into silhouette can create a more dramatic image and keeps the viewer’s attention where the color is strongest.
Night scenes often contain an enormous range of brightness, so a single exposure may not be enough. One frame may preserve city lights while another captures shadow detail. Taking multiple exposures gives you more flexibility during night photo editing and increases the odds of coming home with a keeper. “It costs almost nothing to take a few extra frames,” and that small habit gives you options when you process your images later. The more intentionally you expose in the field, the less you will have to rescue in software.