
What Layered and Intersected Masks Do for Your Photos
Layered and intersected masks in Lightroom are advanced Lightroom editing tools that let you combine and refine multiple automatic selections so only the overlapping, precisely defined areas are affected, giving you precise photo masking on skies, water, and light without heavy manual brush painting or global adjustments that damage the rest of the image.
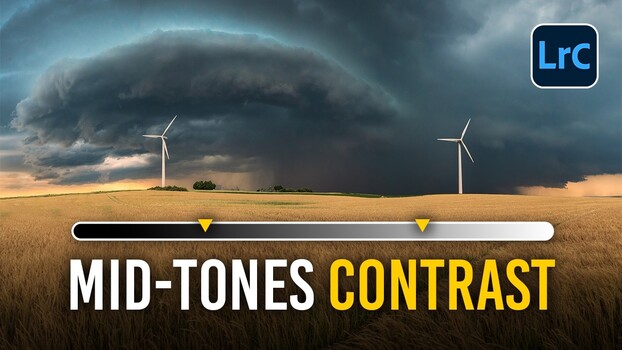
Think of this approach as building your edit in slices instead of one big global push. You start with broad masks that define sky and land, then narrow down with gradients, radial shapes, and range masks until each part of the scene gets exactly the treatment it needs. The payoff is big: a flat, cold panorama can become a dark, dramatic storm scene using nothing but contrast adjustments when those adjustments are placed carefully. This workflow is for photographers who already know the Basics panel and want more control over complex panoramas and multi‑element compositions without spending half an evening brushing around tree branches or waterfall edges.
You will need Lightroom’s current masking panel, plus a willingness to think in layers instead of single sliders. In practice that means starting from a clean raw edit, merging several raw files into a cylindrical panorama when needed, cropping out ragged edges, and even leaving a gap to fix later in Photoshop if that protects an important cloud or subject. From there, profile and basic exposure choices set up your masks to succeed.
Prep the Base Image So Masks Behave
Before you start fancy Lightroom masking techniques, you want a neutral, flexible base. Intersected masks work best when highlights are recovered and midtones are stable, because you can push local contrast harder without clipping. Start with raw files; if you have a sweeping view, merge several raw files into a cylindrical panorama, then crop away the distorted borders and preserve important elements, even if that means leaving one gap for later retouching in another app.
Next, switch your profile from Adobe Color to something more punchy like Adobe Landscape to get a stronger saturation base, then adjust exposure so the scene feels balanced, pull highlights all the way down to recover detail, and warm the white balance to remove any cold color cast. At this stage, keep your global contrast tools modest. One reliable rule is that clarity and dehaze both look wrong when pushed hard across the whole frame, so keep them gentle and save the heavy lifting for masks. Contrast, too, can stretch the whole tonal range at once and crush shadows or blow highlights if you lean on it too hard.
The main mistake here is impatience: cranking global clarity or contrast makes the image pop on first glance but leaves you no room for controlled, local edits later. Take an extra minute in the Basics and Profile sections now and your masks will feel smoother, cleaner, and easier to blend later on.
Step-by-Step: Layer and Intersect Masks for Sky, Water, and Light
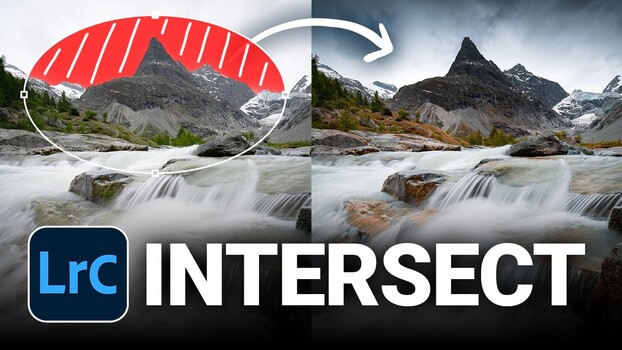
Now comes the part that replaces tedious brush work: stacking and intersecting masks so edits respect real scene boundaries. The intersect mask tool lets you combine two masks so only their overlapping area is targeted, giving you precise control that add and subtract alone cannot match. Follow this sequence and pay attention to why each mask builds on the previous one.
- Create your first broad subject mask: for skies, start with a sky mask; for foregrounds, try a landscape mask based on vegetation or water.
- Clean the broad mask: if the auto sky mask fails on a panorama, use a vegetation-based landscape mask, invert it to grab the sky, then subtract object masks to protect elements like turbines or peaks.
- Darken or shape the upper sky by intersecting the sky mask with a linear gradient so only the top portion darkens without touching mountains or horizon lines.
- Add depth around a light source by creating a radial gradient, positioning it where the light should appear, then intersecting it with the sky mask so glow stays behind the peak and does not bleed into the mountain.
- Target water precisely by building a landscape mask that selects water, then intersecting it with a radial gradient over cascades to isolate them from surrounding rocks.
- Enhance those masked cascades by increasing texture, clarity, whites, and saturation so small water features pop while nearby rock detail stays unchanged.
- For dodging and burning, set your tonal adjustment first with a linear gradient that covers the whole frame so you see the effect, then intersect that gradient with a soft, low‑flow brush and paint only the regions you want to lighten or darken.
- Refine contrast in the sky using layered masks: apply clarity and contrast locally on the broad sky selection, then drop a tighter radial gradient on a key cloud and push clarity much higher there to make it the clear subject.
- Use luminance range masks within your sky to build one mask for brighter midtones, lifting exposure and blue saturation slightly, and another for darker clouds, lowering exposure to deepen them.
- Repeat the broad‑to‑narrow layering on the foreground: a landscape mask to brighten land with added texture and clarity, a linear gradient to subtly darken an overly bright sky top, and final color work in HSL, split toning, calibration, and sharpening for a cohesive finish.
The real change in mindset is that you are no longer painting blindly with a brush. According to Christian Möhrle, setting your tonal adjustments first with a gradient and then intersecting with a brush lets you dial in the look of an adjustment before deciding where it lands, which changes how you think about dodging and burning entirely. It is a clean solution to problems that would otherwise demand repetitive, zoomed‑in brush strokes around edges and fine detail.
Common Masking Mistakes and How to Avoid Them
Most frustration with precise photo masking comes from two habits: leaning on global sliders and treating the brush as your only targeting tool. When you crank contrast or dehaze, you stretch the entire tonal range at once, which can crush shadows and blow highlights before you even start masking. Later, when you try to bring detail back with local edits, you are fighting damage you already did. Instead, treat global contrast, clarity, and dehaze as seasoning, and put the stronger, more dramatic shifts inside masks.
The second trap is painting without a plan. If you begin dodging and burning by brushing areas at random, you often end up with blotchy light and repeated undo cycles. A better approach is to set a linear gradient over the entire image, tune the exposure or contrast so it looks right somewhere, then intersect that gradient with a brush and paint the effect only into shadows or highlights you want to change. This workflow means you see the adjustment first, then choose its location, rather than guessing both at once. Over time, this saves a huge amount of brushwork and gives more natural, dimensional results.
Why This Workflow Is Worth Learning
When you combine careful base preparation with layered masks and the intersect mask tool, Lightroom’s masking tools become far more than simple sky and subject buttons. You can build a hierarchy of edits: broad contrast and color across the sky, stronger clarity and structure on one dramatic cloud, subtle exposure lifts on brighter midtones, and weighty shadows in darker clouds. On the ground, bright cascades draw the eye without affecting nearby rocks because a water‑only landscape mask intersected with a radial gradient keeps adjustments locked to the falls.
Done well, the expected result is that a flat, cold panorama turns into a dark, dramatic storm scene through contrast shaping alone, while fine details like streams and highlights pop without halos or spill onto neighboring elements. The main thing to watch is restraint: keep global sliders modest, build from broad to narrow masks, and use intersect whenever two elements overlap. Once this becomes habit, complex panoramas and multi‑element compositions stop feeling like a chore and start feeling like a controlled lighting exercise you can repeat on any image.