
What Dramatic Sky Editing With Layered Contrast Really Means
Dramatic sky editing with layered contrast means using Lightroom contrast adjustments and precise masking to turn flat, low-impact skies into visually striking stormy or glowing scenes while keeping foreground elements balanced and natural so the whole landscape photo retouching still looks believable rather than over-processed. This is for you if your clouds often look dull on screen compared to how they felt on location, and you want more drama without crunchy halos or cartoon colors. The caveat: you need to think in layers—global first, then local—because contrast stretches tones across the entire frame, while clarity and dehaze can quickly look wrong when pushed too hard everywhere. We’ll walk through a practical workflow that works on wide panoramas and standard mountain landscapes, using Lightroom masking techniques and the intersect mask tool to avoid tedious manual brushwork.
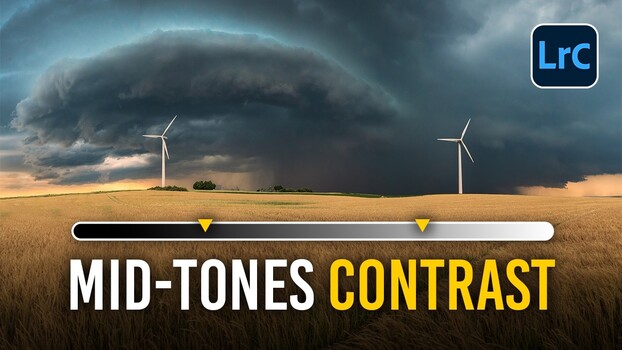
Think of this as editing with intent. A flat, cold panorama of a cloud over farmland can become a dark, dramatic storm scene using nothing but contrast adjustments when those adjustments are planned and layered. The goal is not to impress Lightroom, but to guide the viewer’s eye: sky first, subject cloud second, then a supporting foreground. Before we touch the masks, you’ll set up the file and give the entire frame a gentle base of global contrast that leaves room for the sky to "come alive" later.
Step-by-Step: From Flat Capture to Dramatic Base Edit
- Merge your raw files into a cylindrical panorama, then crop away ragged edges, even if that means leaving a small gap for later repair.
- Switch the profile from Adobe Color to Adobe Landscape to create a stronger saturation base for the entire scene.
- Brighten exposure, pull highlights all the way down to recover detail in the clouds, and warm the white balance to fix any cold cast.
- Set global contrast: keep texture low around seven, clarity near eight to lift midtones, and add a light touch of dehaze.
- Do not push clarity or dehaze hard globally—save stronger micro-contrast for masks, or you risk harsh, crunchy-looking skies.
These steps build a clean foundation before you get selective. According to Christian Möhrle, "For global contrast, keep texture low at around seven, clarity near eight to lift the midtones, and add a touch of dehaze". That quote matters because it shows how restrained the global pass should be. Contrast stretches the whole tonal range at once, which can crush shadows and blow highlights if you lean on it too hard. Clarity, in comparison, adds contrast only in the midtones, where cloud edges and texture live, so it reads as "pop" rather than harshness. By staying gentle here, you avoid the most common mistake: turning the entire frame gritty before you even get to the sky. That restraint also gives you more headroom for the strong local adjustments that will define the mood later.
Targeting the Sky: Smart Masks, Intersect, and Layered Contrast
Now you move from global work to selective, which is where dramatic sky editing really happens. The masking section is where the sky comes alive, but wide panoramas can confuse Lightroom’s sky selector. When a direct sky mask fails, build a landscape mask based on vegetation, invert it to grab the sky, then subtract object masks to protect anything like wind turbines or mountain peaks that should stay untouched. On that broad sky selection, raise contrast and add clarity so the clouds separate clearly, then boost saturation for a stronger blue that matches the mood you’re after. This is your first local layer: big, gentle moves applied only to the sky, instead of the whole frame, which keeps the foreground from looking overcooked while the atmosphere starts to feel dramatic.
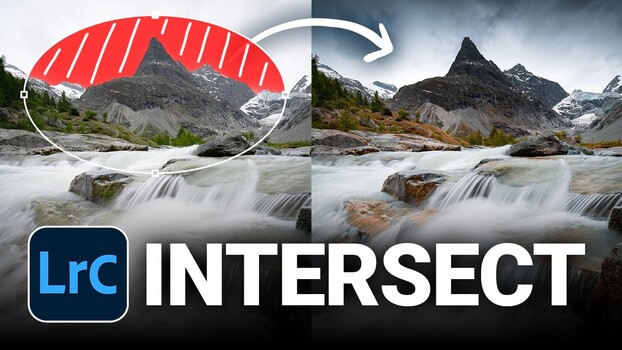
To refine the effect further and avoid manual brushwork, use Lightroom’s intersect mask tool. Start by creating a dedicated sky mask, then intersect it with a linear gradient to darken only the upper portion of the sky without touching the mountain or horizon beneath. You can add a second intersected mask using a radial gradient placed behind a mountain peak or main cloud to simulate a natural light source by bringing up exposure and whites until it feels convincing. Because the radial gradient alone would bleed into solid land or structures, intersecting it with the sky mask keeps the glow exactly where it belongs. This combination solves edits many photographers have been doing the hard way with a brush, and it prevents the common mistake of painting blindly and discovering too late that your tonal changes spilled into the wrong areas.
Deepening Drama: Radial, Luminance, and Foreground Balancing
Once the broad sky is under control, you can tighten focus and layer stronger contrast where it matters most. Drop a radial gradient over the key cloud and push clarity up to about 37 so that single cloud becomes the clear subject. Then use luminance range masks: target brighter midtones with a small exposure lift and a blue saturation push, and build a separate mask for darker clouds where you pull exposure down. The point is layering—broad adjustments first, then progressively smaller, stronger ones as the target narrows, mirroring classic dodging and burning in the darkroom. This approach lets you dial in the look of an adjustment before deciding exactly where it lands, changing how you think about dodging and burning entirely. By concentrating midtone punch on the cloud while protecting the rest of the frame, dramatic skies stop being luck and start to become repeatable craft.
With the sky finished, balance the foreground so it supports rather than competes. Use a landscape mask to brighten the foreground with added texture and clarity so details feel present but not overpowering. Apply a linear gradient to darken the too-bright top of the sky if needed, anchoring the viewer’s eye lower in the frame. In the color mixer, pull down orange and green saturation so grass, soil, or foliage stop competing with the sky, then lift aqua and blue to intensify atmospheric color. You can drop the blue primary hue in the calibration tab and raise its saturation for extra depth, then sharpen the image with a reduced radius, maxed detail, and a masking slider adjusted while holding the alt key to protect smooth areas. For panoramas with a missing corner, finish with a content-aware fill in Photoshop to repair the gap cleanly.
Applying the Workflow to Different Landscapes and Final Takeaways
This layered contrast and smart masking workflow works on more than farmland panoramas. Working through an entire edit, you can merge several raw files into a cylindrical panorama and still guide a viewer from foreground to sky using these tools. The same logic applies to standard mountain landscapes: build a sky mask, intersect it with gradients, and sculpt light where it feels natural. In one example, a sky mask intersected with a linear gradient darkens only the upper sky, and a second intersected radial gradient behind the mountain peak simulates a believable light source. For water scenes, create a landscape mask targeting only water, intersect it with a radial gradient over cascades, then bump texture, clarity, whites, and saturation so those small features pop without affecting surrounding rock detail. The workflow scales well: wide vistas, tight scenes, or multi-frame panoramas all benefit from the same sequence of broad, then focused, contrast-driven edits.
The biggest pitfalls to watch for are overusing global clarity and dehaze, and relying on rough sky selections in panoramas. Clarity and dehaze both look wrong when pushed hard across the whole frame, so keep them gentle globally and save heavy lifting for masks. Because Lightroom sometimes struggles to select skies cleanly in panoramas, use vegetation-based landscape masks, invert them, and subtract object masks until the sky is isolated cleanly. Rather than painting blindly with a brush, set tonal adjustments first with a gradient so you can see the effect, then intersect that gradient with a soft brush and paint only where you want it. When done well, a flat capture becomes a powerful storm scene or glowing sunset built from contrast alone. It is worth the extra thought: layered contrast keeps your skies dramatic, your landscapes believable, and your edits repeatable instead of random.