
What This NAS Software Guide Covers and What You Need First
NAS applications installation is the process of adding extra software—often Docker containers and web apps—to your network-attached storage so it can monitor systems, manage projects, and stream media instead of serving only files.
If you own a Synology or Asustor NAS and want more than basic file storage, installing modern applications is worth your time. With the right setup, your NAS can host monitoring dashboards, infrastructure documentation tools, and a full media server. The real prerequisite: Docker must be available on your NAS model, plus a management UI such as Portainer on Synology or Dockhand on Asustor for smoother container control. According to the Portainer maintainers, version 2.39.5 is their current stable Long Term Support release, fixing multiple issues and CVEs. Before you start, make sure your NAS supports Docker, update its firmware, and confirm that Portainer or Dockhand are installed and at their latest version.
Set Up Portainer on Synology for Docker App Management
On Synology, Portainer is the hub that makes Docker-based application deployment manageable through a web interface instead of command line. Once Portainer is in place, installing apps such as OmniSight and CTRoadmap becomes a repeatable, point-and-click routine.
- Verify your Synology NAS supports Docker, then install Docker from Package Center if needed.
- Install Portainer on your Synology NAS and confirm you are running the latest Portainer version, as required by the OmniSight and CTRoadmap guides.
- Log into Portainer in your browser using your NAS IP and the Portainer port, then sign in with your Portainer credentials.
- From the left sidebar, click Home then Live connect to attach Portainer to your local Docker environment.
- Confirm that the connection is healthy so future stacks, including OmniSight and CTRoadmap, can be deployed without errors.
This sequence matters because Portainer is the base layer for all upcoming Synology Docker apps. Skipping the “latest version” requirement is a common gotcha: outdated Portainer may block stack deployment or fail to apply security fixes. Once connected, you’re ready to turn Synology into a small application platform instead of a plain file server.
Install OmniSight and CTRoadmap on Synology via Portainer
OmniSight and CTRoadmap are Docker-based web applications you can host on your Synology NAS using Portainer stacks. OmniSight gives you a unified monitoring dashboard, while CTRoadmap focuses on visual infrastructure documentation and exports. Both rely on clean folders and stack definitions, so attention to naming and configuration prevents frustrating re-installs.
- On your Synology, create a top-level docker folder in File Station if it doesn’t already exist.
- For OmniSight, inside the docker folder create a new folder named omnisight using lowercase letters only, as the guide warns.
- For CTRoadmap, inside docker create a folder named ctroadmap, then create two subfolders inside it named data and exports, all in lowercase.
- In Portainer, go to Home then Live connect so you are attached to the local Docker environment.
- Click Stacks then + Add stack, and in the Name field enter omnisight for OmniSight or ctroadmap for CTRoadmap, again in lowercase to avoid path and container name issues.
- Paste the provided docker-compose style service definition into the Web editor for each app, adjusting values such as timezone and any secrets as instructed for OmniSight.
- Scroll down and click Deploy the stack, then wait a few minutes for the images to download and start depending on your internet speed.
- After deployment, confirm that OmniSight and CTRoadmap containers are healthy and reach their respective web interfaces to see your Synology metrics or CTRoadmap atlas at a glance.
The biggest gotcha here is naming: both guides stress “Be careful to enter only lowercase, not uppercase letters” for folders and stack names. Changing case can break volume mounts or create duplicate paths. When everything is deployed correctly, you’ll have your Synology metrics at a glance and your CTRoadmap app at a glance, ready for monitoring and documentation work.
Set Up Lunarr on Asustor (and Other Supported NAS Platforms)
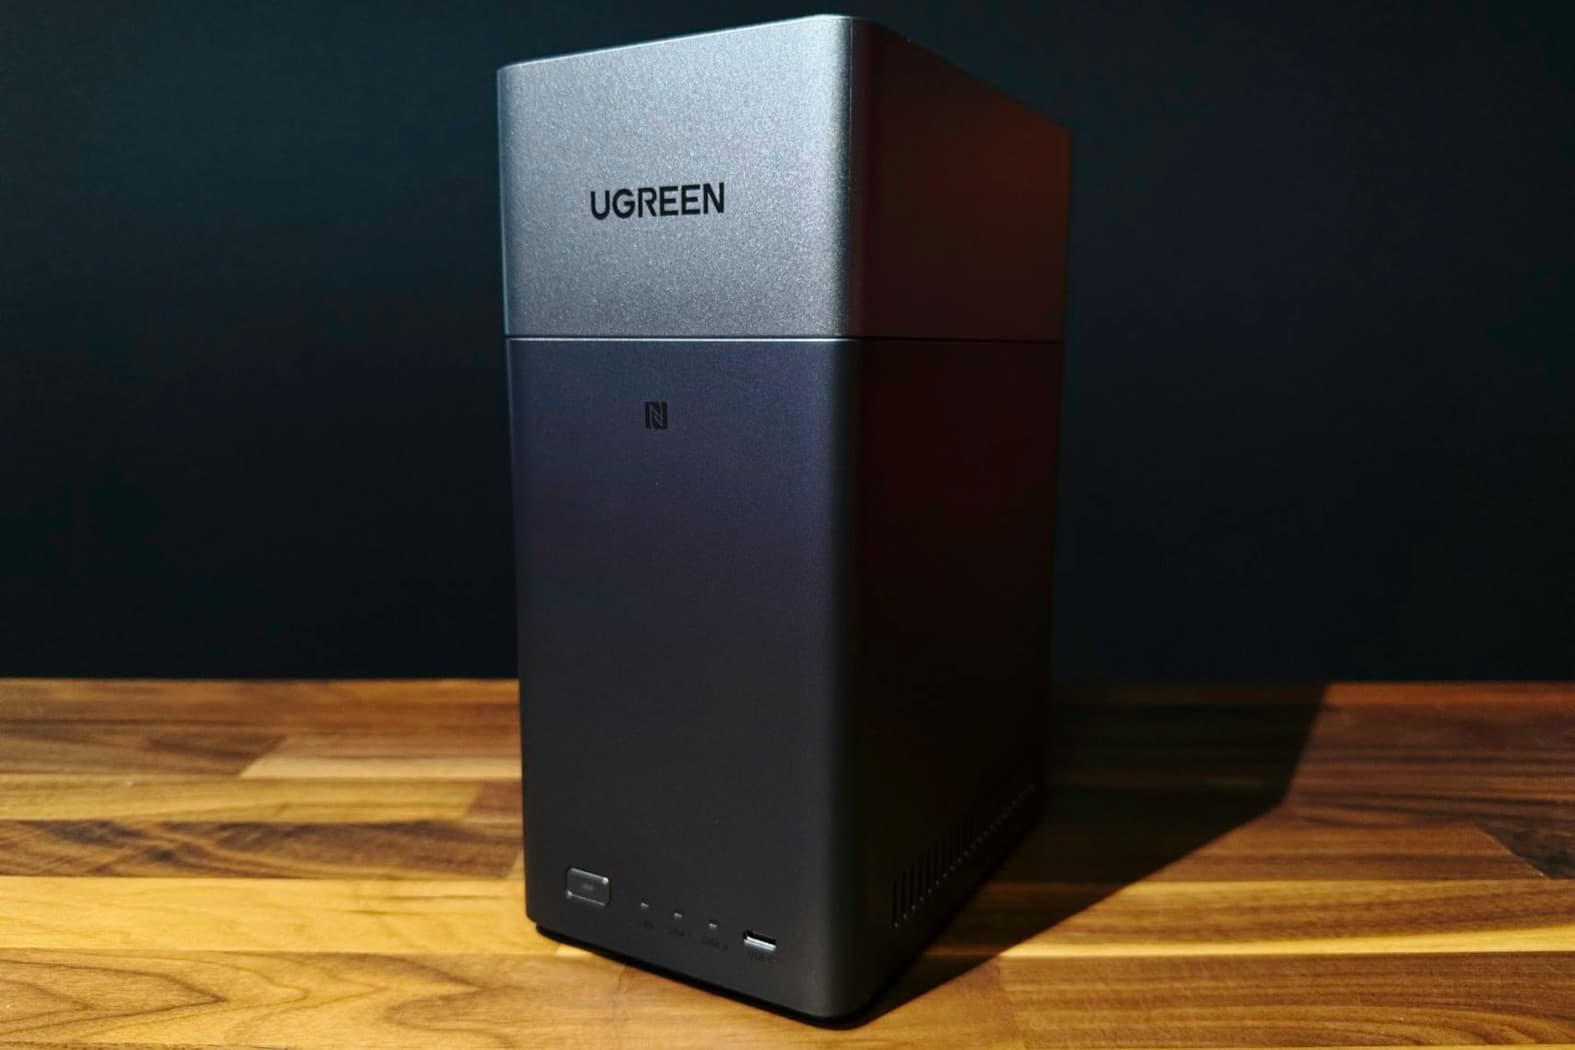
Lunarr is a self-hosted media streaming server and Plex alternative designed to run on NAS devices through Docker containers. On Asustor, you use Dockhand as the management UI, but Lunarr is also installable on Synology and UGREEN NAS models with dedicated guides, giving you multi-platform installation compatibility.
- Install Dockhand on your Asustor NAS following its step-by-step guide, and ensure you are using the latest Dockhand version as recommended.
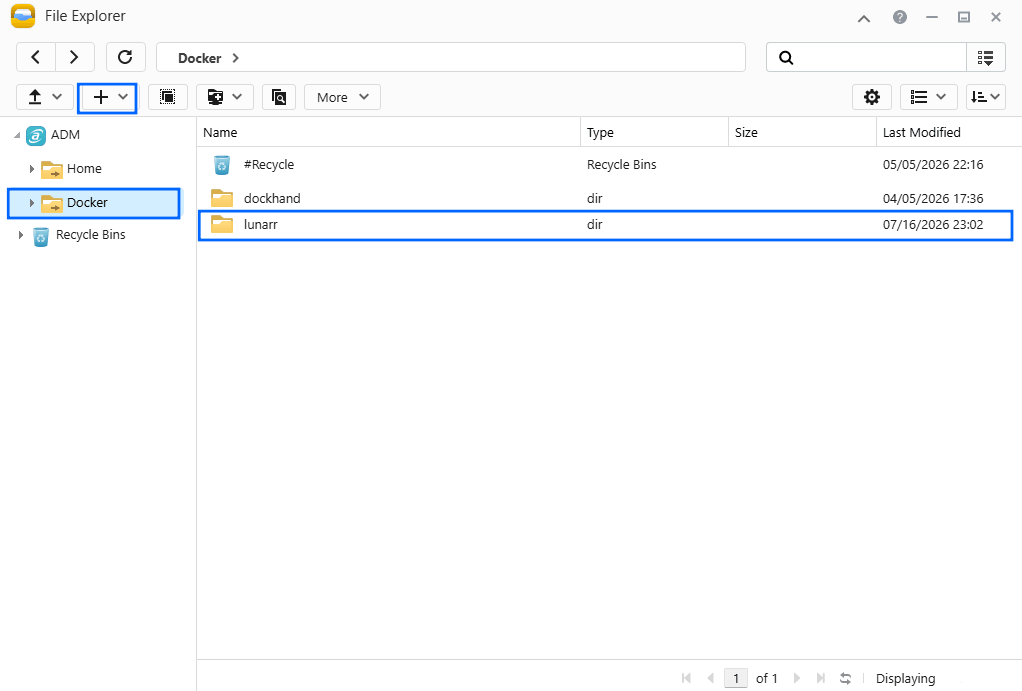
- Open File Explorer and locate or create a Docker folder on your Asustor NAS.
- Inside the Docker folder, create a new folder named lunarr in lowercase letters only to match the guide and avoid path mismatches.
- Within lunarr, create two subfolders named config and media, again using lowercase only as warned.
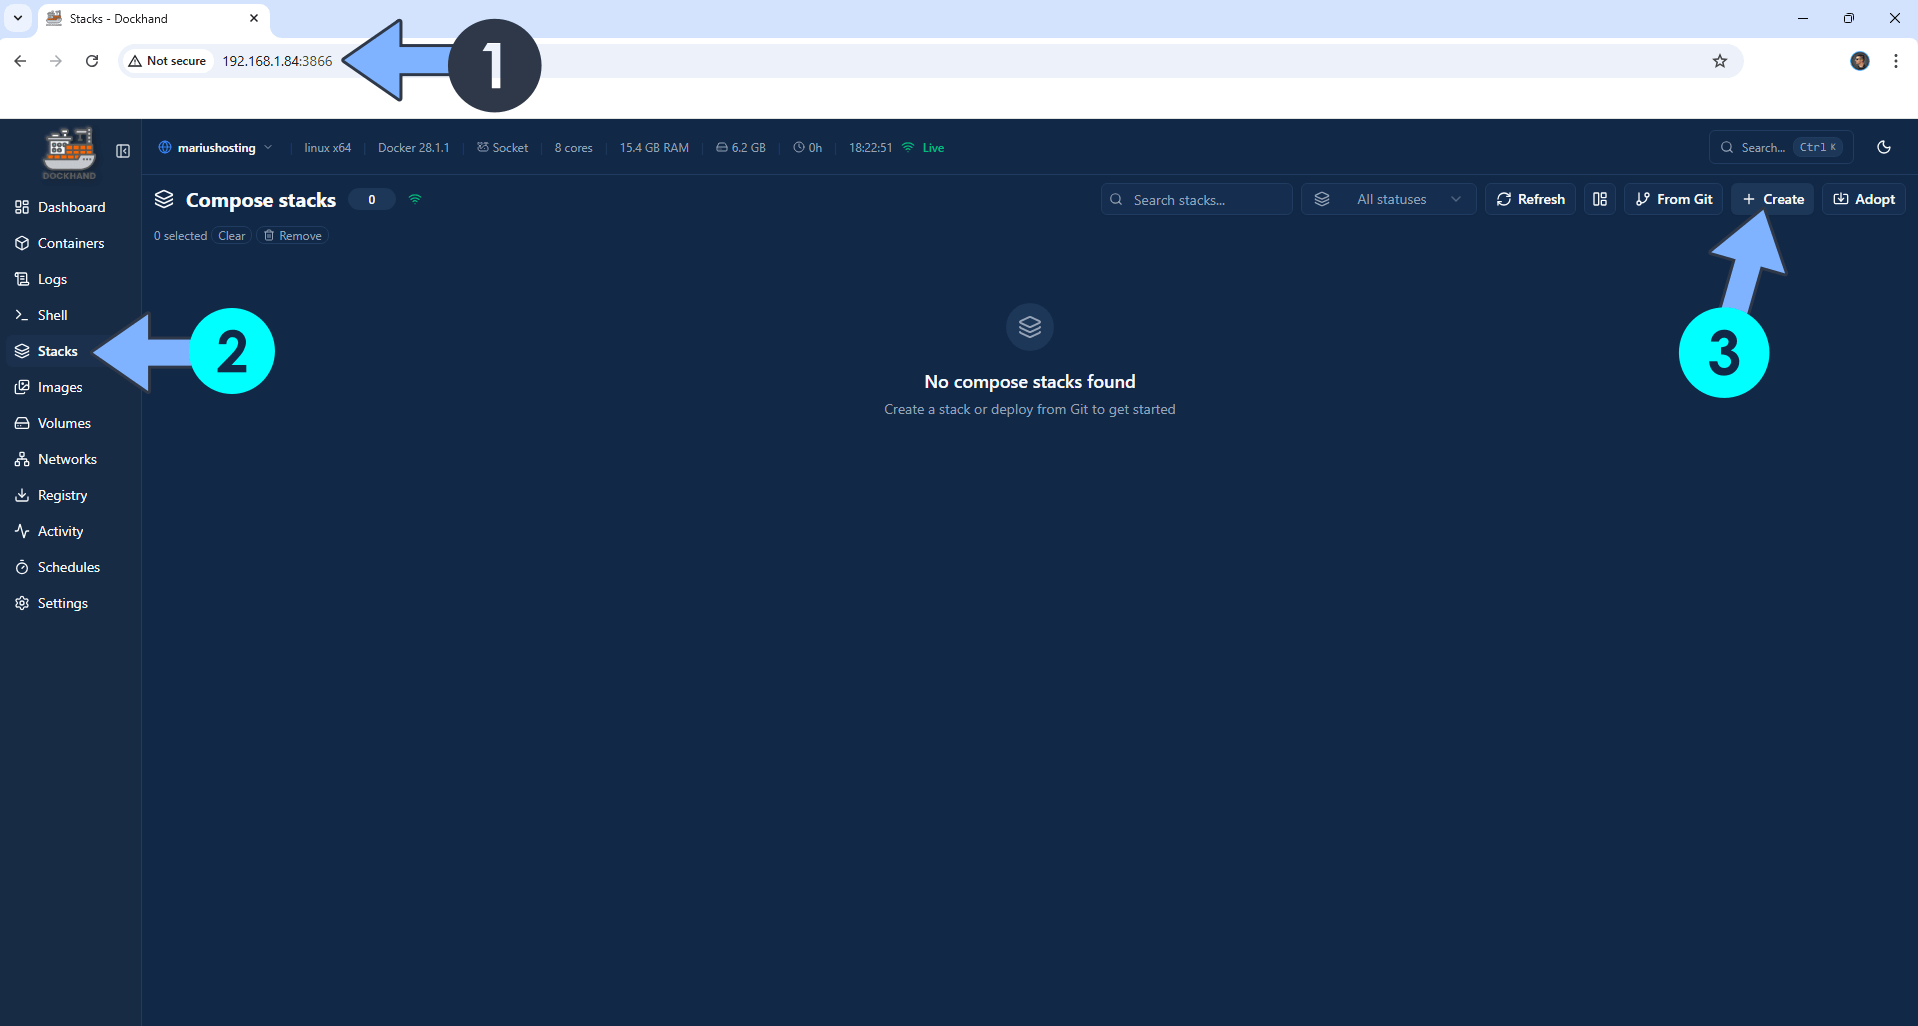
- In your browser, connect to Dockhand by visiting http://asustor-ip-address:3866, replacing with your NAS IP.
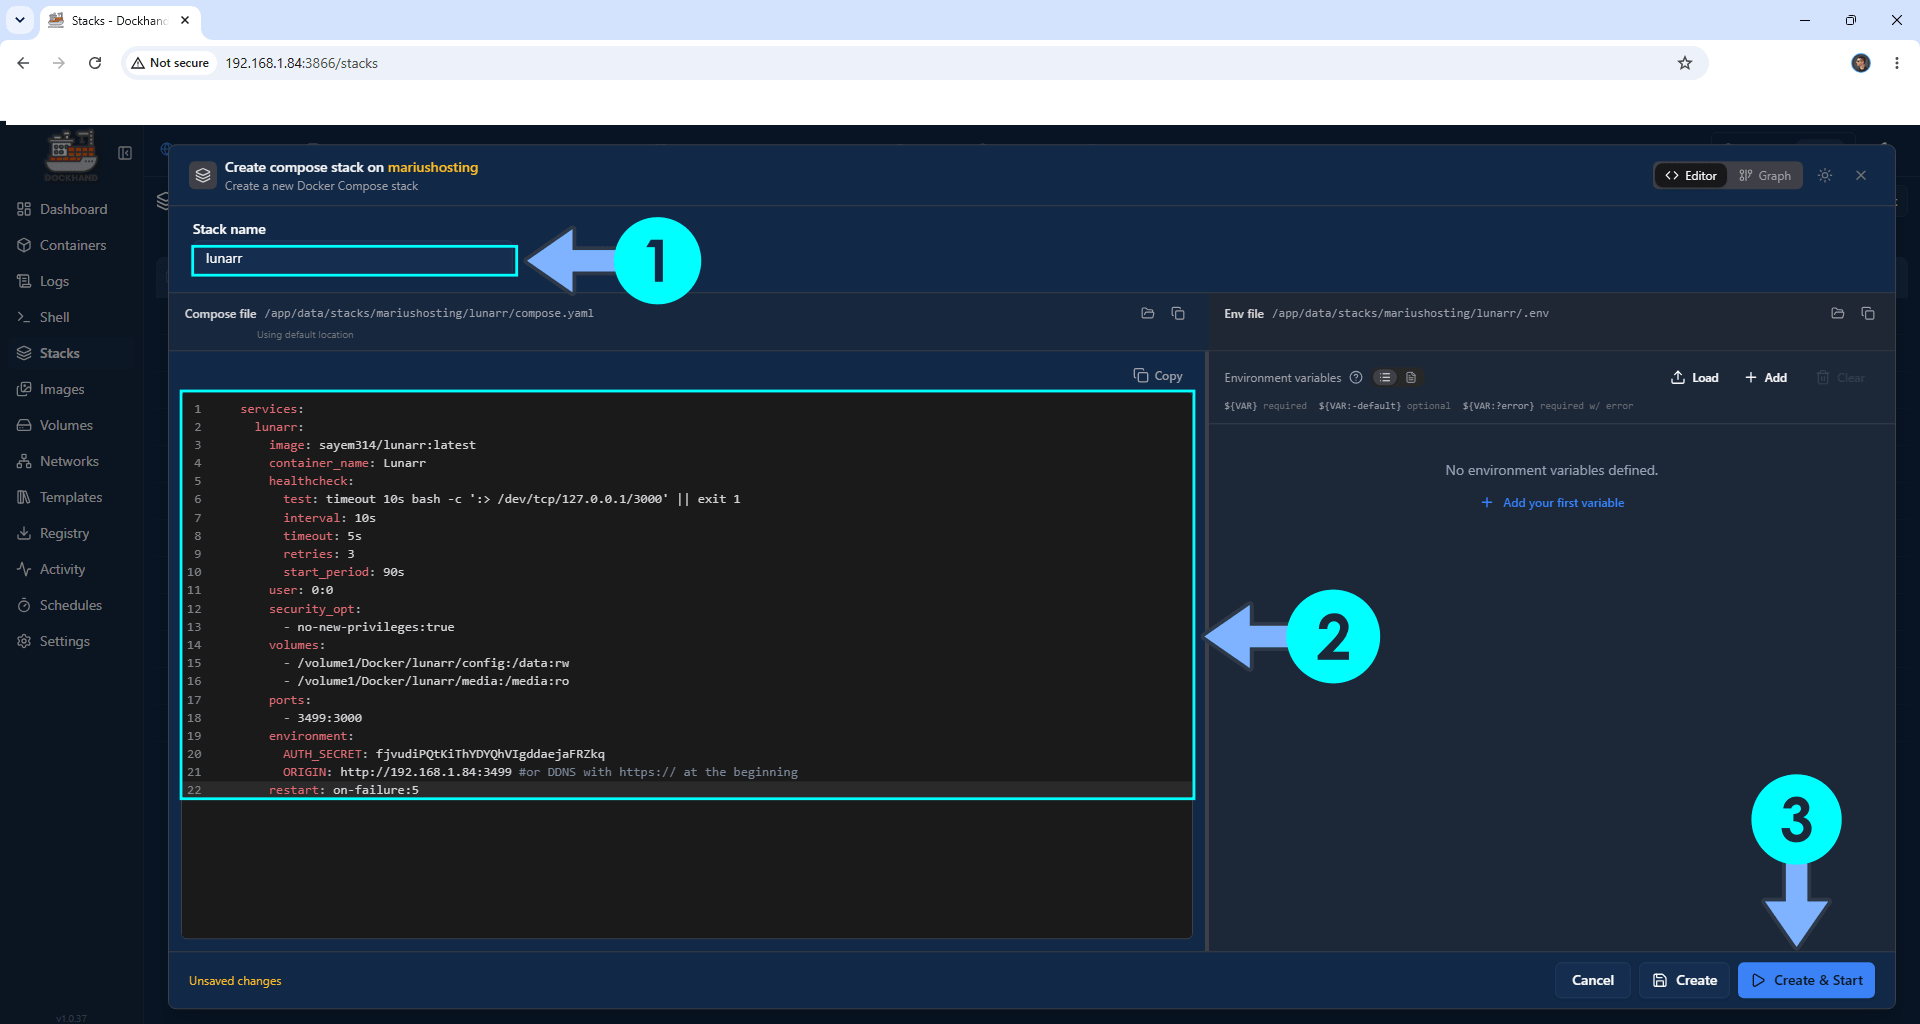
- From Dockhand’s left sidebar, click Stacks then + Create to start a new application stack.
- Enter lunarr as the Stack name, respecting the lowercase requirement to prevent deployment errors.
- Paste the Lunarr Docker stack configuration (from the Lunarr guide) into the editor, link the config and media folders as volumes, then create and start the stack so Lunarr downloads and runs.
On Asustor, the common mistake mirrors the Synology guides: capital letters in folder or stack names can cause Lunarr’s container to miss its volumes or fail to initialize. Once the stack deploys and the container starts, you can enjoy Lunarr on your Asustor NAS, organizing and streaming your media through a modern web UI. And if you later move to Synology or UGREEN, separate guides cover Lunarr installation on those NAS platforms as well.
Is Installing NAS Applications Worth It?
Turning your NAS into an application host is worth it if you want monitoring dashboards, infrastructure documentation, or media streaming without running extra servers. The main caveats are basic: your NAS must support Docker, Portainer or Dockhand must be on their latest versions, and you need to be disciplined about lowercase names for folders and stacks to avoid subtle bugs.
Once you’ve gone through the steps, daily use is straightforward: Portainer and Dockhand give you a web UI for container control, OmniSight and CTRoadmap appear as browser apps, and Lunarr becomes your media hub. This NAS software guide shows that with a bit of care during setup—and attention to those lowercase naming warnings—you gain long-term flexibility from hardware you already own.